Download the last version of Debian for from the URL "http://cdimage.debian.org/debian-cd/6.0.2.1/i386/iso-cd/" and "debian-6.0.2.1-i386-netinst.iso" images. This version is the minimum in size. I selected that version, because I want to see/show all required packages and applications. I have Ubuntu 11.04 and VirtualBox 4.0.4 in my computer. I installed that Debian into the virtual host at VirtualBox with the default (only selected ssh server while installation) installation settings.
apt-get install mrtg
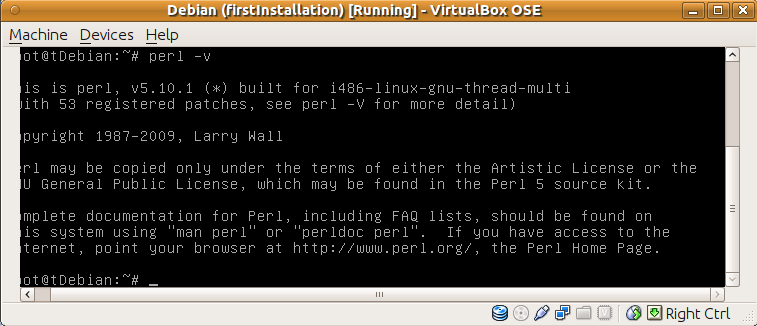
Mrtg is a perl script so the Perl interpreter is required. I'm checking the Perl interpreter:
a) I will need a http server to publish web pages that are generated by the Mrtg script.
b) I will need a php interpreter to analyze html outputs of mrtg script.
c) I will need a mysql database to save some options and data about auto alert generating.
I'm installing apache2, php5 and mysql-server5 for All that requirements;
apt-get install apache2 php5 mysql-server

After than installation, you can see used ports on your linux to check the status of Apache and Mysql services like following image:

You can check the Apache & Php status using the code below:
<?php phpinfo(); ?>
If the file name is "test.php" and path of the directory is "/var/www/", the phpinfo() function should send an output on your browser when you enter the http://youraddress/test.php address. The next step is to test the mysql server and to make a connection between php and mysql servers. You can use the following php script:
<?php
$link = mysql_connect("localhost","root","youPasswordOnPicture")
or die("Error: Can not establish connection to MySQL Server");
?>
If the file name is "testMySQL.php" and path of the directory is "/var/www/", you should not to see nothing on your browser when you enter the http://youraddress/testMySQL.php address. Having a message "Error: Can not establish connection to MySQL Server" means the database server connection is unsuccessful.
If have reached this line without any error/problem, we can jump to mrtg part again: The mrtg script queries your active network devices (routers, switches, firewalls etc.) via SNMP protocol. So you have to configure the snmp settings on your active network devices. I will add a basic snmp setup for some mostly used devices.
You can use following command to generate a mrtg configuration file.
cfgmaker CommunityString@deviceA.of.Ip.Address --output deviceA.cfg
This command creates a file with name "deviceA.cfg". We have to edit some lines in this file like following:
# Created by
# /usr/bin/cfgmaker CmmntyString@172.28.201.10


### Global Config Options

#  for UNIX
WorkDir: /var/www/html/mrtgGraphics/relatedDevice/

#  or for NT
# WorkDir: c:\mrtgdata

### Global Defaults

#  to get bits instead of bytes and graphs growing to the right
Options[_]: growright, bits

EnableIPv6: no
...
...
..
If you use MS Windows Operation System, simply uncomment the line "WorkDir: c:\mrtgdata" and put a '#' char to comment the line "WorkDir: /var/www/html/mrtgGraphics/relatedDevice/". We are capable to define directions of graphics and unit types of data. Possible choices for bit and byte for unit and frowright and growleft for direction. (Bunun frowright olduğuna emin misin? flowright olabilir mi?)
Each single interface is defined in this configuration file like following:
Target[3661-fasteth00-systemsegment]: 2:CmmntyString@172.28.201.10:
SetEnv[3661-fasteth00-systemsegment]: MRTG_INT_IP="172.28.201.10" MRTG_INT_DESCR="FastEthernet0/0"
MaxBytes[3661-fasteth00-systemsegment]: 12500000
Title[3661-fasteth00-systemsegment]: Traffic Analysis for 3661-FastEthernet0/0 SystemSegment
PageTop[3661-fasteth00-systemsegment]: <h1>Traffic Analysis for 3661-FastEthernet0/0 SystemSegment</h1>
           <div id="sysdetails">
                   <table>
                           <tr>
                                   <td>System:</td>
                                   <td>UGC_Topkapi_3661 in </td>
                           </tr>
                           <tr>
                                   <td>Maintainer:</td>
                                   <td>Name of The Responsible Person</td>
                           </tr>
                           <tr>
                                   <td>Description:</td>
                                   <td>FastEthernet0/0 Connection to SYSTEM Segment </td>
                           </tr>
                           <tr>
                                   <td>ifType:</td>
                                   <td>ethernetCsmacd (6)</td>
                           </tr>
                           <tr>
                                   <td>ifName:</td>
                                   <td>Fa0/0</td>
                           </tr>
                           <tr>
                                   <td>Max Speed:</td>
                                   <td>12.5 MBytes/s</td>
                           </tr>
                           <tr>
                                   <td>Ip:</td>
                                   <td>172.28.201.10 ()</td>
                           </tr>
                   </table>
           </div>
"3661-fasteth00-systemsegment" is the filename of generated html file in path "/var/www/html/mrtgGraphics/relatedDevice/". Each interface has got a different filename like "3661-fasteth00-systemsegment". We have to keep " 2:CmmntyString@172.28.201.10:" part in that configuration file but we can change the other parts such as title, pagetop, and other expressions between html tags.
When we finish editing the configuration file, we have to execute mrtg command with this configuration file as below:
/bin/env LANG=C /usr/bin/mrtg /etc/mrtg/cfg-files/3661.cfg
But the problem is, this command should be re-executed every 5 minutes to get statistics continuously. We can use crontab for this goal. The crontab line is like following for this sample,
*/5 * * * * /bin/env LANG=C /usr/bin/mrtg /etc/mrtg/cfg-files/3661.cfg >/dev/null 2<&1
My MRTG server has got a lot of cfg files and I prepared crontab lines are like this,
0,5,10,15,20,25,30,35,40,45,50,55 * * * * /bin/env LANG=C /usr/bin/mrtg /etc/mrtg/cfg-files/3661.cfg >/dev/null 2<&1
1,6,11,16,21,26,31,36,41,46,51,56 * * * * /bin/env LANG=C /usr/bin/mrtg /etc/mrtg/cfg-files/otherfile.cfg >/dev/null 2<&1
2,7,12,17,22,27,32,37,42,47,52,57 * * * * /bin/env LANG=C /usr/bin/mrtg /etc/mrtg/cfg-files/anotherfile.cfg >/dev/null 2<&1
At this point, our MRTG structure is ready for use. The generated html files are located in path "/var/www/html/mrtgGraphics/relatedDevice/".
[root@mrtg relatedDevice]# ls -l | grep 3661-fasteth00-systemsegment
-rw-r--r-- 1 root root   4649 2011-10-13 16:45 3661-fasteth00-systemsegment-day.png
-rw-r--r-- 1 root root   6951 2011-10-13 16:45 3661-fasteth00-systemsegment.html
-rw-r--r-- 1 root root  98062 2011-10-13 16:45 3661-fasteth00-systemsegment.log
-rw-r--r-- 1 root root   4548 2011-10-13 15:30 3661-fasteth00-systemsegment-month.png
-rw-r--r-- 1 root root  98062 2011-10-13 16:40 3661-fasteth00-systemsegment.old
-rw-r--r-- 1 root root   4337 2011-10-13 16:35 3661-fasteth00-systemsegment-week.png
-rw-r--r-- 1 root root   4756 2011-10-13 04:40 3661-fasteth00-systemsegment-year.png
[root@mrtg relatedDevice]#
If mrtg cfg file has got a lot of interface parts, so lots of html files will be generated. We will need an index page for this situation. We can use following command to generate an index page for our statistics pages.
indexmaker deviceA.cfg > index.html
This command will generate a file with name index.html. We have to move this file to "/var/www/html/mrtgGraphics/relatedDevice/" directory. 3661-fasteth00-systemsegment.html file has got a part like following:
<!-- Begin `Daily' Graph (5 Minute -->
           <div class="graph">
                   <h2>`Daily' Graph (5 Minute Average)</h2>
                   <img src="3661-fasteth00-systemsegment-day.png" title="day" alt="day" />
                   <table>
                           <tr>
                                   <th></th>
                                   <th scope="col">Max</th>
                                   <th scope="col">Average</th>
                                   <th scope="col">Current</th>
                           </tr>
                           <tr class="in">
                                   <th scope="row">In</th>
                                   <td>9117.6 kb/s (9.1%)</td>
                                   <td>3139.1 kb/s (3.1%) </td>
                                   <td>5966.2 kb/s (6.0%) </td>
                           </tr>
                           <tr class="out">
                                   <th scope="row">Out</th>
                                   <td>9144.2 kb/s (9.1%) </td>
                                   <td>3159.9 kb/s (3.2%) </td>
                                   <td>6001.8 kb/s (6.0%) </td>
                           </tr>
                   </table>
           </div>
<!-- End `Daily' Graph (5 Minute -->
This part contains numeric values of usage of related interface. We can capture these values every 5 minutes and write to mysql table. Also we can define some limits about that line and compare actual value and limit value. If actual value reaches limit value, the script will be able to generate an alert message. This article is only about the installation of MRTG, Apache http server, php5 and Mysql-Server. The next article will about "how to auto analyze mrtg results with php scripts".