Sunday, December 4, 2011

Facebook Like Button Example With JQuery

Hi! We all got a Facebook account. As you remember, Facebook's got so much options that we can use, Like button, Chat, TimeLine etc.

In last article, I made mention of Jquery used within Facebook. Today, I'll show you one of'em. That is "like button".

As you know, when our friends share something, we can like it easily. When clicked the like button, data is saved without refresh. Because of this is JQuery&Ajax. Actually this example is not going to be like Facebook Like Button Module exactly, but, may be a good idea to do it for some of us. This things're so easy to do. We all need a database, a PHP page and a coding ajax page with ajax library, where is that complex?

Let's start it!

First, create your MYSQL Table;
CREATE TABLE `jquery_app`.`LikeButton` (
`ID` INT( 11 ) NOT NULL AUTO_INCREMENT PRIMARY KEY ,
`data` VARCHAR( 255 ) NOT NULL
)
You shall need this files:
  1. settings.php //database configurations
  2. jquery.js //your jquery code
  3. jquery library //you must include this file on index.php page
  4. match.php //your php code that you do like something and write database
  5. index.php //default page

index.php

This is facebook like button example. This is what i share! :)
< a href="#" id="like">Like < div id="whathappened"> //We see total clicked like button
< /div>
< div id="whathappening"> //We see what happening now
< /div>

When click the link, sending query to jquery.js page. After that jquery starts ajax method and searchs match.php page for adding +1.

jquery.js
// JavaScript Document
$(document).ready(function() {
 $('#like').click(function() {
  $('#whathappening').fadeIn(1000);
  var wait="Adding..";
  $.ajax({
   cache:false,
   async:false,
   url:'match.php',
   success:function(inc) {
    $('#whathappened').html(inc);
    $('#whathappening').html(wait);
    $('#whathappening').fadeOut(1000);
   }
  });
 });
});

When id=like click, data'll been added to database. If you ask how to add this, you should analyze the page is shown below.

match.php

 include("settings.php");
 //adding data
 $random=rand(0,99999999);
 $ekle=mysql_query("INSERT INTO LikeButton(data) values('$random')");
 //how many data we got
 //with the data we've just added
 $show=mysql_query("select * from LikeButton");
 $total=mysql_num_rows($show); //Getting total liked
 echo "Total: ".$total; //Print total liked.

What you see here, all php code. We include settings.php page for connection database. We get total and add +1 to this.

settings.php

 $conn=mysql_connect("localhost", "username", "password") or die("error1");
 mysql_query("SET NAMES 'utf8'") or die("error2");
 mysql_select_db("jquery_applications",$conn);
 error_reporting(0);
 ini_set('display_errors','Off');
 error_reporting(E_ALL); 

That's it! You've just done Facebook like module. If you want to see how to work this, you can visit the web site for demo.
Module view
When "Like" link click

Saturday, December 3, 2011

Cursed ad-hoc networking problem on Android


It is stil a problem to connect my Samsung Galaxy Tab P-1010 (Wi-fi only) to Internet
through my cell phone. Since Google does not do anything about this, people individually
seek for a solution for this. I have tried many compiled wpa_supplicant.so files on my device,
unfortunately, the only picture that I saw was a tablet computer without wi-fi support.

I have a new idea about this. I know it is not an elegant solution like debugging the source code of wpa_supplicant
and compile it for several devices.  But this is worth to share.

Firstly, suppose that we have an Android device with Wi-fi feature only and call it "Android Device". And suppose that we have a Java installed cell phone (it would be an S6 installed Nokia or Blackberry or an android cell-phone), and we will call it "Cell Phone". The development steps
for my solution are given below:

(Step 1) Implement a tiny http proxy for the Android Device. Suppose that, it listens from the port 8088.
(Step 2) Set the proxy settings on the web browser of Android Device, "localhost" for host and "8088" for port.
(Step 3) Implement a tiny JavaME application, which accepts URL's that sent by (Step 1) through a bluetooth connection, and downloads the
content of the accepted URL's and sends the content using the same bluetooth connection to the http proxy defined in (Step 1).


Now, we can expand those steps for our idea. Suppose that, the http proxy given in (Step 1) is connected to the JavaME application (Step 3) with bluetooth. There are many bluetooth protocols but I think (but I am not really sure about that)
the rfcomm type connection is the common type in both the JavaME and Android.

Whenever the proxy in (Step 1) accepts an URL, it sends this request to the JavaME application using the bluetooth connection.
The application defined in (Step 3) has an internet data plan, so it downloads the content and sends them to the proxy in (Step 1). 

Ok, not the best way, but it seems it would work.

Maybe, somebody wants to implement this.

Wednesday, November 30, 2011

How to Connect Cisco Router with PHP Scripts


I used to explain a Perl version of these scripts in page "http://stdioe.blogspot.com/2011/09/how-to-connect-cisco-router-with-perl.html". And now, I'm talking about the Php version. Because, Php is known to be easier than Perl by the most of the people. You may want to implement these samples in your existing projects. Essentially, we are establishing a telnet session between our script and a Cisco router. It's only a telnet connection. There are a lot of telnet-scripts for php in the internet. You can use them but we are talking about a specific situation. Let's write it from scratch.

I prepare to write those scripts as much as parametric, that is, I will avoid writing all of staff hard-coded. "$argv" variable is a predefined array in Php and it is able to capture the given parameters as well as in the console. For example,

<?php
#!/usr/bin/php
$if(isset($argv[2])) {
print "The first parameter is:".$argv[1]."\n";
print "The second parameter is:".$argv[2]."\n";
} else {
print "usage: ./sample.php parameter1 parameter2 \n";
print "or \n";
print "usage: php sample.php parameter1 parameter2 \n";
}

?>

You can execute the script by typing "./sample.php" or "php sample.php" directly in your console. If you want to execute it as "./sample.php", you have to add the line (#!/usr/bin/php) on the top of your script and you have to give executive permissions to sample.php. (chmod +x sample.php). If you want to execute with the syntax "php sample.php", you don't need to add the line and give those rights. Because, the executing rights are already given for "php" part.

The sample.php script is capturing your parameters using the array variable $argv. You can see all of the $argv content using the line "print_r($argv);" in you Php script. So we will use the $argv array to take ip_address, username and password values from the user. I used fsockopen, fput and fgets commands to establish connections, to send commands and to get the output from the router, respectively.

If the cisco router output is very long for one page, it returns a " -- More -- " statement in the last line. If we press the space button on the keyboard when we see this statement, the router will send next page. If we press the enter key on the keyboard when we see this statement, router will send the next line. So we have to control the content and if there is a " -- More -- " statement in the content, we have to send a space character to get next part of the router output. We will control the " -- More -- " statement with an "ereg" function of php.

The php script for connecting to the Cisco router (telnetCisco.php):

#!/usr/bin/php
<?php
if(!isset($argv[2])) {
die ("usage: ./scriptName router_ip username password\n");
}
$port = 23;
$timeout = 10;
$router_ip = $argv[1];
$username = $argv[2];
$password = $argv[3];

$connection = fsockopen($router_ip, $port, $errno, $errstr, $timeout);

if(!$connection){
echo "Connection failed\n";
exit();
} else {
echo "Connected\n";
fputs($connection, "$username\r\n");
fputs($connection, "$password\r\n");
fputs($connection, "show run\r\n");
fputs($connection, " ");

$j = 0;
while ($j < 16) {
fgets($connection, 128);
$j++;
}
stream_set_timeout($connection, 2);
$timeoutCount = 0;
while (!feof($connection)){
$content = fgets($connection, 128);
$content = str_replace("\r", '', $content);
$content = str_replace("\n", "", $content);
print $content."\n";

# If the router say "press space for more", send space char:
if (ereg('--More--', $content) ){ // IF current line contain --More-- expression,
fputs ($connection, " "); // sending space char for next part of output.
} # The "more" controlling part complated.

$info = stream_get_meta_data($connection);
if ($info['timed_out']) { // If timeout of connection info has got a value, the router not returning a output.
$timeoutCount++; // We want to count, how many times repeating.
}
if ($timeoutCount >2){ // If repeating more than 2 times,
break; // the connection terminating..
}
}
}
echo "End.\r\n";
?>

"stream_get_meta_data" function is the most critical one in this article. Because, I used the stream_get_meta_data to check the status of connection. Following output shows the "stream_get_meta_data" content with print_r function to see "how to recognize end of the output". (The last three loop)

....
...
Array
(
[stream_type] => tcp_socket
[mode] => r+
[unread_bytes] => 0
[seekable] =>
[timed_out] => 1
[blocked] => 1
[eof] =>
)
Array
(
[stream_type] => tcp_socket
[mode] => r+
[unread_bytes] => 0
[seekable] =>
[timed_out] => 1
[blocked] => 1
[eof] =>
)
Array
(
[stream_type] => tcp_socket
[mode] => r+
[unread_bytes] => 0
[seekable] =>
[timed_out] => 1
[blocked] => 1
[eof] =>
)

The time_out values are "1" in the last two loops. The $timeoutCount value is counting that "1"s in the telnetCisco.php and if it gets "1" more than two times, it stops reading the output with a "break;" line.

Monday, November 28, 2011

making a ThinClient OS with pxeboot support


When I needed a thin client for the company which I am working for, I firstly researched some existing products on the market. (wise, chipPc etc.) Actually, there were some good things but I needed a more customizable one. When the subject is about customization, I have got an unique address for solution: that's
linux. I wanted to create a simple, easy to setup and strong solution. I checked following criterias:
  1. I had to use a complete distrubution to start to work. Because, all distrubutions are ready for use. I didn't need to handle more to start.
  2. I had to create image file/files as OS. It should be open from image / images files every times. Therefore, It can keep ifself as strong.
  3. If I could supply the Boot On Lan feature on my pxeboot server, the clients would never get damaged in the future. Because all clients would run on only their RAM device. Altough they had been shutdown un-properly, they could stil read the original image file from the pxeboot server. I only needed keep the image file safe which is located on the pxeboot server.
I researched a few distros and than I selected the SLAX for my project. It's using squash FS (lzm files). It seemed the best choice for my requirements about the image.. SLAX distro is normally used on the usb devices. It's a kind of mobile version of Linux. You can use it in several hardwares.

However; I had to change something on standard SLAX. The history of my project begins.

In order to install Slax, download the USB image from site "http://www.slax.org/get_slax.php". After extracting it, it will generate two different directories: slax and boot. Firstly we need dir2lzm and lzm2dir scripts/commands to extract lzm files and to re-build the lzm file again. These are located in the directory /slax/tools/.


Slax has got a very nice structure. Making manipulations are very easy and controllable. For example, you can create a module file to create some changes from original slax and you can apply this changes by a single copy-paste operation. There is a director, with name modules, exists for this purpose. After starting to make changes in 001-core.lzm file located in base directory, I realized that this was not a good way.

Note: Your linux (also windows OS) has got a variable about default PATH to find predefined commands on your operating system. But your tools directory (located in Slax directory) is not included in the PATH variable. So if you try to execute lzm2dir command in somewhere, you will not be able to execute it. You can execute it with a full path or you can execute it with "./lzm2dir" command when you are located in tools directory or you can add your tools directory it to the PATH. Most useful way is adding the tools directory into the your PATH variable. Suppose that your Slax directory is located in the /home/User. We can get and set the PATH environment variable as shown below:

[user@hostn stdioe]#  /home/User/slax
[user@hostn stdioe]# /home/User/slax/tools <- related commands located in here
[user@hostn stdioe]# echo $PATH <- to check existing value of your PATH variable
/usr/lib/mpi/gcc/openmpi/bin:/home/User/bin:/usr/local/bin:/usr/bin:/bin:/usr/bin/X11:/usr/X11R6/bin:/usr/games:/opt/kde3/bin:/usr/lib/mit/bin:/usr/lib/mit/sbin
[user@hostn stdioe]# PATH=$PATH:/home/User/slax/tools <- to add slax-tools directory to in your PATH variable

Good, We can use that commands from everywhere by now. Let's extract the 001-core.lzm file to do some manipulations.

Note: Actually, that commands are just several simple shell scripts. The real commands are squash FS commands. If squash FS is not installed in your operaing system, you can not use the tools directory scripts. You have to have squashfs installed on your system. The squashfs is a read-only file system with efficient compression property. It's essential and base thing so, almost all distrubutions has got it in their package manager. You can install it using your package manager.

Let's extract the file 001-base.lzm and start to manipulation step; I created a stdioe directory and copied the file 001-core.lzm to the the directory stdioe. I created a directory called core_Dir to extract contents of the lzm to the directory core_Dir.

[user@hostn stdioe]# pwd
/root/stdioe
[user@hostn stdioe]# ls
001-core.lzm
[user@hostn stdioe]# mkdir core_Dir
[user@hostn stdioe]# lzm2dir 001-core.lzm core_Dir/
TIOCGWINZ ioctl failed, defaulting to 80 columns
[===========================================================-] 12069/12069 100%[root@ismldgn stdioe]#
[user@hostn stdioe]# ls
001-core.lzm core_Dir
[user@hostn stdioe]# cd core_Dir/
[user@hostn core_Dir]# ls
bin dev home media opt root srv tmp var
boot etc lib mnt proc sbin sys usr
[user@hostn core_Dir]#

core_Dir directory is a container for our thin client OS file structure. First of all, we have to focus on the file /etc/rc.d/rd.M. The file manager starts up the process.

We will create an image file which will then be used by our thinclients. So if we don't solve the problem of hostnames, all our thinclients will have got the exactly same hostnames. The main problem is, all of them connect to the same terminal server. The terminal server can not handle the connections properly. If you look from terminal server side, you can see a lot of clients are connected but all names are the same!

Normally rc.M assigns a hostname from contents of the file /etc/hosts. My offer is, we can create a new and different hostname for each client while booting progress. The mac address information already provides an unique information for this. We can use the mac to assign them different names! We can edit our commands after the line in which it is written "# Initialize the networking hardware.".


ls -aA1b /etc/dhcpc | egrep ".info\$" | while read INFOFILE; do
# the next line won't affect rc.M variables, because it's in >while read< loop
. /etc/dhcpc/$INFOFILE
echo "TPL`/sbin/ifconfig | /bin/grep "HWaddr" | /bin/gawk -F' ' '{print $5}' | gawk -F: '{print $1$2$3$4$5$6}'`."$DOMAIN >/etc/HOSTNAME
sed -i -r "s:127.0.0.1\tslax.*:127.0.0.1\tslax.$DOMAIN slax:" /etc/hosts
break
done

Well. Now, each client has got a different hostname. All hostnames start with a TPL prefix and continue the mac info without ":" and ".$DOMAIN" variable, respectively. If you don't need FQDN name, do not use the ".$DOMAIN" part.

This OS will be used as a thin client os. So the main goal is to "connect to the terminal server". We don't need advance graphical user interface. We need simple a simple solution. I selected fluxbox for this purpose. When the OS starts, the fluxbox should be opened automaticly. For this purpose, we have to add the content shown below with a ".xprofile" name in the "/root" directory. This configuration is to start the fluxbox GUI.

session=/usr/bin/startfluxbox
/usr/bin/setxkbmap tr
#/usr/bin/rdesktop terminalServerAddr -f -r printer:oki="Epson LX-80" -k language

The -k option is for defining the language. Please replace the proper language code for your language. The line marked with a '#' supplies a connection to the terminal server automaticly but I marked it to make it disabled, because user may want to do a different thing. So we have to create a menu file for fluxbox GUI. Let's create a lzm file again from the edited base package and create a new module file for other purposes.

[user@hostn stdioe]# 
[user@hostn stdioe]#
[user@hostn stdioe]# ls stdioeBase/
bin boot dev etc home lib media mnt opt proc root sbin srv sys tmp unsped usr var
[user@hostn stdioe]# dir2lzm stdioeBase/ 001-base-edited.lzm
[=============- ] 2337/10544 22%

Right now, our base lzm file is ready. But normally we have to create a module file for our changes. We don't have to handle the original base file. because when we a new release is published, we will need to handle it again. But if we create a module file, the copy paste operation will probably be enough for this. Also the module mechanism is very useful feature. Let's create a module file for other requirements,

[user@hostn stdioe]# mkdir nameOfModule
[user@hostn stdioe]# mkdir nameOfModule/root
[user@hostn stdioe]# mkdir nameOfModule/sbin
[user@hostn stdioe]# cd nameOfModule/root
[user@hostn stdioe]# mkdir .fluxbox
[user@hostn stdioe]# cd .fluxbox
[user@hostn stdioe]# vim menu

Content of the menu file is shown below:

[begin] ('The Project Name' - MENU)
[encoding] {UTF-8}
[submenu] (Tools)
[exec] (Command Window) {xterm}
[exec] (Internet Browser) {kfmclient openProfile webbrowsing}
[exec] (Text Editor) {kwrite}
[restart] (KDE GUI) {startkde}
[end]
[submenu] (Remote Desktop : termSrv.dom)
[exec] (800x600) {termsrvDOMr1}
[exec] (1024x768) {termsrvDOMr2}
[exec] (Tam Ekran) {termsrvDOMrf}
[end]
[exec] (Shutdown Computer) {pcShutdown}
[endencoding]
[end]

Of course, some used commands are not default ones. These are user defined. We have to write them and set execution permissions and locate them into a proper directory as value of $PATH variable. That files are listed below.

pcshutdown:

#!/bin/bash
init 0

Note: Our thin client os is already running on the RAM. So we can shutdown up-properly. "init 0" is the most rough way.

termsrvDOMr1:

#!/bin/bash
/usr/bin/rdesktop termsrv.DOM -g 800x600 -k tr -r printer:UGLpoki="Epson LX-80" -d DOMAINNAME -u ""

termsrvDOMr2:

#!/bin/bash
/usr/bin/rdesktop termsrv.DOM -g 1024x768 -k tr -r printer:UGLpoki="Epson LX-80" -d DOMAINNAME -u ""

termsrvDOMrf:

#!/bin/bash
/usr/bin/rdesktop termsrv.DOM -f -k tr -r printer:UGLpoki="Epson LX-80" -d DOMAINNAME -u ""

Finally set to execute permission and copy it to /sbin directory. After all, create lzm file of the module.

[user@hostn stdioe]# chmod +x pcshutdown termsrvDOMr1 termsrvDOMr2 termsrvDOMrf
[user@hostn stdioe]# cp pcshutdown termsrvDOMr1 termsrvDOMr2 termsrvDOMrf nameOfModule/sbin/
[user@hostn stdioe]# dir2lzm nameOfModule nameOfModule.lzm
[===================================================================|] 6/6 100% [user@hostn stdioe]#
[user@hostn stdioe]#

Right now, if we copy that lzm module file to modules directory, this module will be enabled when booting the OS automaticly. But we still don't create a module for printer driver and configuration. That file content is a little bit long so explaining how to create a printing module is not a good idea in this.. But you can use a usb version of Slax and open it with "Slax Graphics mode" option and install printer driver and configure it then shutdown properly. Then, if you check directory changes, you can find all changes about the printer installations and configurations. The problem is, existing files are not only about the print functionalty. You have to select printer related ones. I can create a download link in this page, but usually it is not a good idea to create a download link about any file. If some body want to download that file, I will send it.

Good. Our thinClient OS is ready. We prepare it from the usb version of Slax. And now, we will prepare a tftp server and http server to get the pxeboot server ready. TFTP server installation and web server intallation are not related to this article, so I don't explain it. But I have to say again, your http server should be a permitted directory and configured as indexing compatible with httpfs property. Because, when the boot process starts, our pxeboot server will send the boot parameters via tftp server and than starts to use the https service for loading big files. Because tftp is a UDP based service and http is a TCP based service. Nobody wants to use UDP based service to load big files. So UDP does not check the data whereas TCP uses a checking mechanism while data is transfering.

The boot directory should be located in the directory "tftproot" and Slax directory should be located in the http publishing root directory. (/var/www/html or /srv/www or something like that).

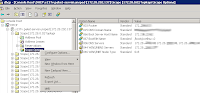
The last step is to configure the DHCP server for pxe booting. My project environment has got a Microsoft Windows 2003 Server for DHCP server. When you right click to scope option and select the configure option in this DHCP server, you can see a window. This window has got "066 Boot Server host Name" and "067 Boot File Name" options lines. You have to add the ip address of your pxeboot server to "066 Boot Server host Name" option and write "/boot/pxelinux.0" for "067 Boot File Name" option. Right now, if you set "boot on lan" option in a client computer bios, as a client computer starts, it will search a DHCP server, and it will learn pxe boot server address, file name info, the boot parameters from the tftp server and OS files from pxeboot server via httpfs service, respectively.


Content of the file /tftproot/boot/pxelinux.cfg/default is shown below:

PROMPT 0

LABEL linux
MENU LABEL Run linux over PXE
KERNEL /vmlinuz
IPAPPEND 1
APPEND vga=769 initrd=/initrd.gz ramdisk_size=6666 root=/dev/ram0 password=qwe123 rw autoexec=xconf;telinit~4

LABEL memtest86
MENU LABEL Run Memtest utility
KERNEL /mt86p

This project is suitable to be developed more.. I created more than one configuration files. When the boot process starts, it will be able to read mac address and get the configuration as its mac info. So we can make more than one groups. Each single member of the group can read different module files and configurations. For example, you can create two different groups and than you can include some mac addresses of that groups. Every group have got a single configuration file. Therefore, every client will use their own setting. By the way, I think the most powerfull feature of this OS is, It will never crash!. Because it will use the same lzm file for booting process. If you can create a usable OS, you will always be able to use it. Itwill never need "disk defragmentation" or something like this...

String ambiguity in Java


Java has two kind of data types. The first one includes the primitive data types. They are int, long, double
float, short, byte, boolean and char. Defining a single variable with one of the data types given above is similar
to variable declaration in C or C++. As in C brother, Java simply allocates a proper memory area for the given
type and maps the variable name for it when we type

int i;

in a program. It is simple to understand and clear. The mechanism underlying instantiating a class to create a new object
is similar to C++. For example, we create an object by instantiating a CCObject class using

CCObject *obj = new CCObject();


in C++, whereas, it is

CCObject obj = new CCObject();


in Java. In C++ example, a memory area is allocated for the CCObject and it is mapped to pointer obj which is shown as *obj.
We call its method "meth" using a code similar to

obj->meth();

whereas, it is

obj.meth();

in java. They are both created using a dynamic loading mechanism, that is, they does not exist in compile time and they
are created in runtime. In this use of "->" operator, object instantiating mechanisms are similar. However there is an
other method of creating objects in C++ which is like

CCObject obj;
obj.meth();


and it is totally different from the examples above. In this example, the object obj is created at the compile time
and it is faster. The dot operator is also different from the same operator in Java. Understanding the dynamic class
instantiating and compile time creating is important.

Lets have a look at the String class in Java, which is defined in the package java.lang in the Java core library. We can
create two Strings using a code

String s1 = "This is string 1";
String s2 = "And this is the second one!";

and we can do

String cat = s1 + s2;

which requires a "operator overloading" operation in C++. In Java, there is no operator overloading, that is, you can
not define a behavior for a given operator on a given class. But String class do that!

String class is an exception and it has got different properties when compared to others. Java compiler behaves different
when it compiles the codes with a String object. The another ambiguity is using literals with class methods. Look that:

String s = "Hello, this is a curse Java string";

This use seems like the Java Strings are built-in data types rather than objects! Ofcourse, Java compiler changes this line to

String s = new String("Hello, this is a curse Java string");

but what about this? :

int l = "Hello, this is a curse Java string".length;

If a Java student looks this line, the Java String seems to be an object again! This is because of the weird design of Java Strings.
Java compiles them in a consistent way but being Java Strings a exception obstructs the clean pattern of Java language.

What is the solution?

Firstly, for my personel opinion, operator overloading would be a good property for Java language. So, it would be a more elegant solution
to drop this

Matrix A = new Matrix (data1);
Matrix B = new Matrix (data2);
Matrix C = A.transpose().product(A).inverse().product(A.transpose().product(B.transpose));

and replace with

Matrix A = new Matrix (data1);
Matrix B = new Matrix (data2);
Matrix C = (A.transpose() * A).inverse() * A.transpose() * B.transpose();

This provides the consistency in the use of summation operator with String classes.

Dropping the ambiguity in the cases that "a string content".length and String s = "This is a string" is hard because millions of
Java code uses this syntax. Deprecating this use and dropping it in next revision is a solution. It would be still as it is. But
remember the Basic language and remember how difficult to parse it was. Writing code in an easy way is not the whole art. A consistent
language is like an deterministic toolbox.

My radical idea is to use the C++ syntax in Java virtual machine. Something must be an object, something must be a pointer to an object. Operators
would be overloaded as "Java does it to its Strings!". So, how it would be nice if we compile this code into the JVM:

String *s = new String("Hello there, it would be a Java String!");
int length = s->length;
System::out::println(*s->chars);

and of course

String s = String("Hello there... it is also a Java String");
int length = s.length;
System::out::println(&s.chars);

:)

Moreoever, there would be some strangers around who want their C++ syntaxed Java code compiled into the JVM!